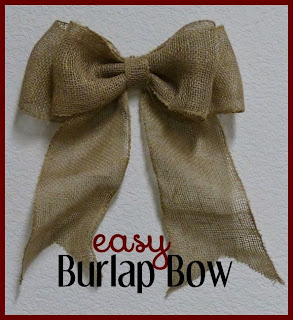
DIY'ing is huge currently. People are putting away their checkbooks, and pulling out their glue guns. Thanks to Pinterest & Youtube, the sky is the limit for recreating some of your favorite crafty decor.
You can blame my photog/family friend Niki B. for crafting me up my first wreath a few months back & the fact that she lives 1100 miles away and can't make me a new one every month when I NEED a change of scenery, for this tutorial. SO, I crafted one, and realized how stinkin' easy & CHEAP it was to do it!
I'm in no way attempting to mass produce these, I simply thought some of y'all would appreciate having one (or 4) at an affordable price point - and personalized for you! I have zero intention of threatening the the avid wreathing community out there.. this is just for fun!
 The first wreath was more Memorial Day/Fourth of July-esque and for me that's only going to cut it maybe 2 months of the year, so the second neutral one will suffice for the tutorial (until my next trip to the craft store)!
Keep in mind, I made the patriotic one for ONLY $8(!!!) all with supplies from Hobby Lobby!
Where as the cream/burlap one totaled out at $17ish - but thats because of it's embellishments!
Things you'll need:
- a hot glue gun & glue (who doesnt own this already?)
- grape vine wreath | $4-$7 depending on size (paid $3 with coupon)
- burlap roll | $4 (paid $2.50 with coupon)
- lace ribbon | $3
- tiny chalk board | $2
- embellishment {the arrow drawer pull} | $10 (paid 6.50 with coupon)
- felt (I had some in my craft closet, but it's a quarter a sheet, need be)
- scissors
- sewing pins
 |
| DIY Wreath Supplies |
Now, these prices were what they were listed at in my local store, be prepared for that to vary based on where you live.. I happened to be out with my friend and daughter, who each pulled up the 40% OFF hobby lobby code on their phones + cashed out separately. This made my three most expensive items, way less!
Also, I COULD of gone with a cheaper embellishment, but that arrow drawer pull just SPOKE to me!
 Prior to my shopping trip, I did some serious Pin'ing on Pinterest.. these were the absolute inspiration for my wreaths. Silk faux flowers weren't what I was looking for, for either of these wreaths + just I loved the tiny felt flowers!
First I laid out 5ft of burlap, then hot glued the lace/burlap ribbon to it.
You'll also need to do this with 24" of burlap, too for the inside of the bow.
This is the Bow Tutorial video I used to achieve the look, it's not that different from a cheer bow; if you've ever had to make one (or 10!).
 The felt flowers were also a breeze, so much that my 7 year old did some of them!You trace a circle, cut it out then cut into it; yellow brick road style. Once you've achieved the perfect little road you roll it up, keeping the outside of the "road" as the top. At this point, I used a sewing pin to keep the flower together until I hot glued it to the wreath. You can additionally cut the outside of the circle in patterns, it will give your flower some texture for a variation from the flat circle.
I really love using chalk board pens, vs traditional chalk, less mess & better execution when it comes to a design.. not that some great design was achieved here (lol!).
When I first starting laying out the Patriotic one, I had also planned on a putting a self illuminating "D" in the center.. I may still.. or maybe just save it for another wreath.. but it was apart of my original design!


No comments:
Post a Comment